


Focus of Part 2: A detailed look into my first table. I used stuff to show off my stuff. For my first table, I think I did an alright job, but there are definitely changes I am going to make for future shows. In Part 3, I'll be writing about Lessons Learned.
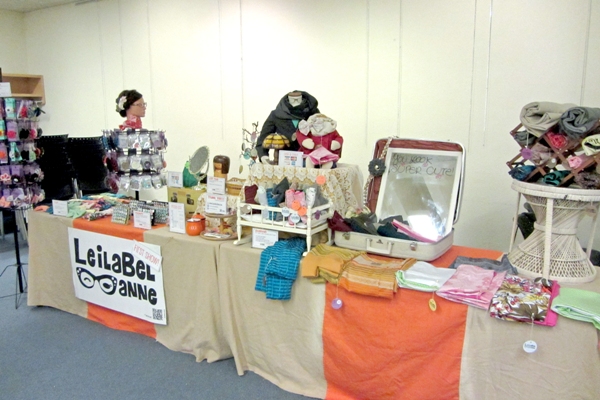
Onto a detailed look into LeilaBel Anne's first show table. Some photos are from my mock display in my bedroom because I didn't take blog-quality pics. I think I was a little too excited to be there. *embarrassed pout
[Reminder] Available SUPER CUTE Goodies for Sale: scarves, hair accessories, gift tags, and magnets
The evolution.
When applying for the show, I set up a mock display using one table and one standing rack. (NOTE: I later upgraded to two tables and one standing rack at no additional cost). Check out the 'Before' and 'After'. While both set ups have a similar look, the set up was sssooo different.

The flow.
I grouped my related products together and varied the height of the table landscape with props and boxes. Not only does it make your eyes dance across my Super Cute goodies, but it was actually a written rule for the show. "Well, damn...."- that's what I thought too. TIP: Once you empty your boxes and bins of product and/or supplies, use them on the table to vary height.
The details.
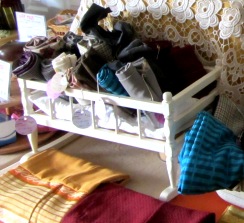
1. SCARVES
a. Distressed cradle, $6, thrift store - for rolled up child infinity scarves
b. Folding wine rack, $4, thrift store - for rolled up adult infinity scarves
c. Child and infant mannequins, $50 for both, online classifieds - Most 'scarf' vendors only sell adult sizes. Kids can be stylin' too! Mannequins are an easy way to convey which sizes you offer without saying a word to shoppers.
TIPS: Provide a large mirror if you offer accessories or clothing. Shoppers need to see how they look. Write a special message on your mirror. Shoppers are staring at it - use that space to write your website or a message..."You look SUPER CUTE!" I used a vintage suitcase, $15, thrift store, to prop up the large mirror and display a few scarves. Scent the scarves - The scented candle totally worked! My scarves smelled cinnamon-y when I took them out. I also placed the candle under the cradle to scent my table. A third way to 'scent the scarves,' use fabric mist. :) Sprayed my whole table with that fresh linen smell.


2. Hair Accessories
a. Mannequin head, borrowed from my bro (the hair stylist) - grouping multiple clips together will show how they are complementary and may entice shoppers to buy more than one
b. Spinning racks, borrowed from my hubby (the lure manufacturer)
TIP: Show other purposes of hair accessories. Gift boxes, on belt, clipped on scarf (there is a pin back on my medium and large clips)

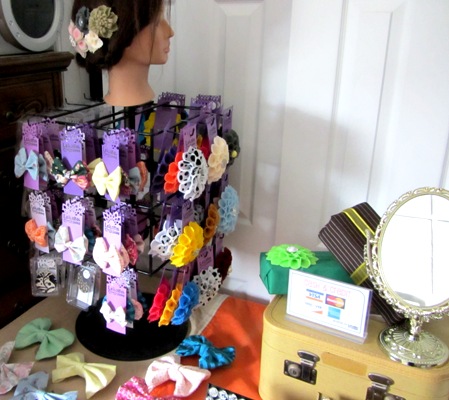
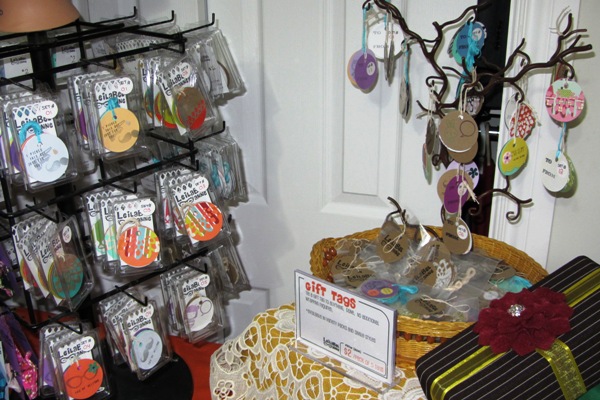
3. Gift Tags
a. Spinning racks, borrowed from my hubby (the lure manufacturer) - for gift tags that come in variety packs
b. Basket, $3, thrift store - for gift tags that come in single style bags
c. Jewellery tree, $30?, Costco - to display the different sets available in variety packs
d. Gift boxes, fabric covered tissue boxes, handmade

4. Magnets
a. Metal frame - $1.25, Dollarama - see previous post

The add-ons.
Signage
a. Pricing - each item has its own sign (NOTE: I've changed the wording slightly)
b. 'Thank You' - paired with a tiered display of candy and business cards
c. Logo, $5, Vistaprint - prefer to have had it hung on the wall behind the table, but we weren't allowed to use tape on the walls
Super Cute accents
Purchased from thrift stores - wax candle holder lamp, Kawaii-style statue, vintage suitcase unknowingly from my aunt
EYEGLASSES! I almost forgot! *head smack On mannequins, on me, already part of my logo. It's all about brand continuity.


I wrote this post because I didn't easily find posts or photos online by craft show participants explaining in detail how they set up their tables. Hopefully I've inspired you. Let your creative minds be free!
BONUS TIP: Use rubber bands to set up merchandise on spinning racks BEFORE the day of the show. Rubber bands were twisted across each row to hold the product cards in place. A large, clear garbage bag was pulled over to protect everything and help with transport. Good tip, right? I've never seen that before...let your creative mind be free.


Much love,
j.anne
No comments:
Post a Comment