


I've become hooked on day planners. I blame all the beautiful and enabling photos on Instagram. One of the items that I've seen by every #PlannerNerd/#PlannerAddict/#PlannerJunkie are embellished paper clips. For our 1st project, Leilani and I are going to make our own page markers.


-Paper clips
Silver, jumbo clips are 5cm long.
Coloured, giant clips are 10cm long.
-Ribbon, lace binding, yarn, string, or strips of fabric
For the jumbo clips, cut the ribbon to 10cm.
For the giant clips, cut the ribbon to 15cm.
-Scissors
-Tape measure, ruler
-Lighter (optional) to heat seal the satin ribbon
-Glue gun and glue (optional) to help secure ribbon that may loosen
-Charms with jump or split rings (optional) for added flair
-Pliers (optional, not pictured) because most of you may not want to damage your nails like I did.


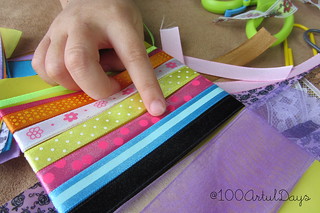


Leilani: Pink one! Of course...
Me: Now choose the ribbons you want.
As I picked up each ribbon, I asked her which colour it was. It's a good idea to ask questions along the way to encourage your child to understand why you are doing something. They are also more likely to stay attentive when they are part of the process.
With the multiple ribbons she selected, she centered and laid them on top of each other.
 TIP: Ensure you hold the paper clip the correct way. The shorter loop needs to be pointing downwards. After folding the group of ribbons in half, she pushed the folded edge through the top her paper clip. Think luggage tag. You know when you're at an airport and they give you one of those identity tags with the elastic string...use that same technique for threading the open ends of the ribbons through the folded opening (the loop).
TIP: Ensure you hold the paper clip the correct way. The shorter loop needs to be pointing downwards. After folding the group of ribbons in half, she pushed the folded edge through the top her paper clip. Think luggage tag. You know when you're at an airport and they give you one of those identity tags with the elastic string...use that same technique for threading the open ends of the ribbons through the folded opening (the loop).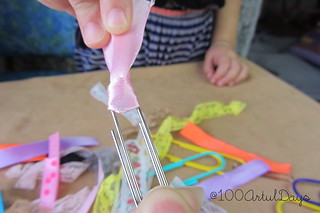 TUG OF WAR!
I held onto the paper clip while Leilani grabbed the open ends of ribbon. I need to remember to give myself a manicure before our next project. Terrible nails. Ha! :) We played 'tug of war' to help tighten and secure the ribbon. I also encouraged her to pull each ribbon end individually to secure it even more. TIP: You may need a dab of hot glue, which is what I recommend. Trim the ends if you need to. Heat seal the ends of ribbon if you have not already done so to prevent fraying.

And that's it! Extra flair? Add charms! By linking split or jump rings to the charm, you can first thread the ring around the paper clip prior to adding ribbon (or after...totally up to you).


Hello little friend!
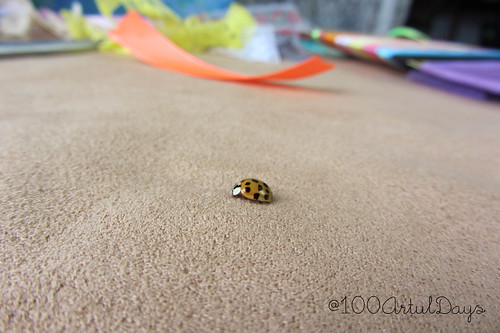
Before we even started, we were visited by a lady bug. Pure distraction. Maybe that's why Leilani only did three. :) And then Evie, Leilani's little sister, got a hold of it. What a way to go...
Thanks for checking out my first DIY post! I hope you can join Leilani and I on our @100ArtfulDays journey.

 @100ArtfulDays is a blog and Instagram series dedicated to the shared love of crafting between my daughter and I. We will focus on collaborative art projects that will further develop my daughter's fine motor, problem solving, speaking, and communication skills, improve her patience, learn and apply colour theory, and encourage her creative spirit.
No comments:
Post a Comment